¶ User Guide: Personalize the wishlist details page
Use a Shopify page template plus the app’s Gatto Wishlist Page block so the wishlist page matches your theme. Then point the app at that page.
Published guide: Customize the wishlist page
After you follow the steps, if the page is still blank, contact support and mention custom wishlist page setup.
¶ Setup
¶ 1. Create a page template
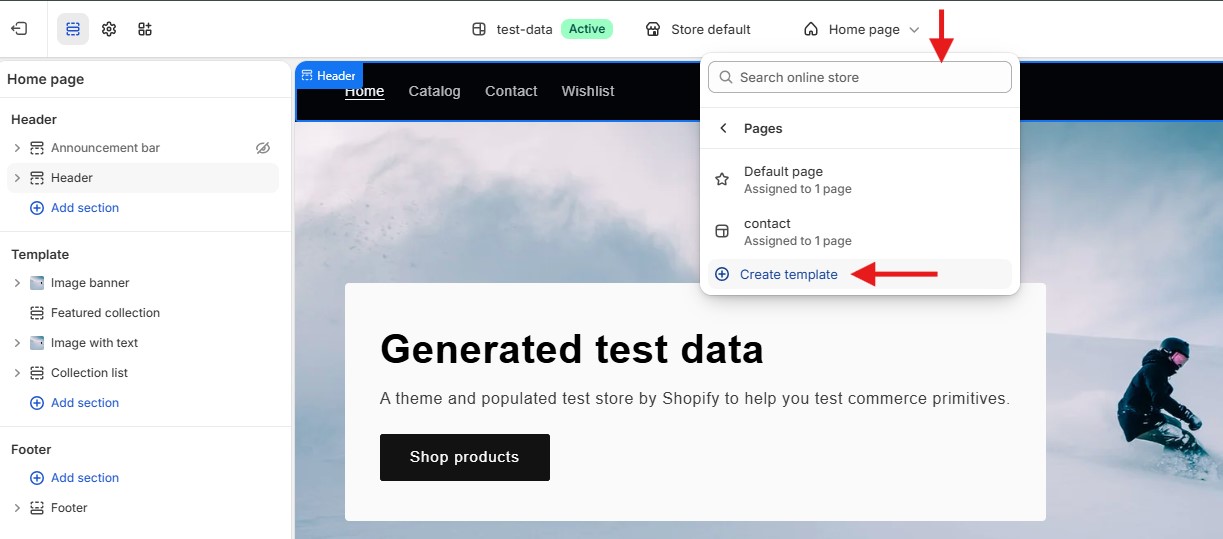
- Online Store → Themes → Edit theme.
- Open the Pages template dropdown.
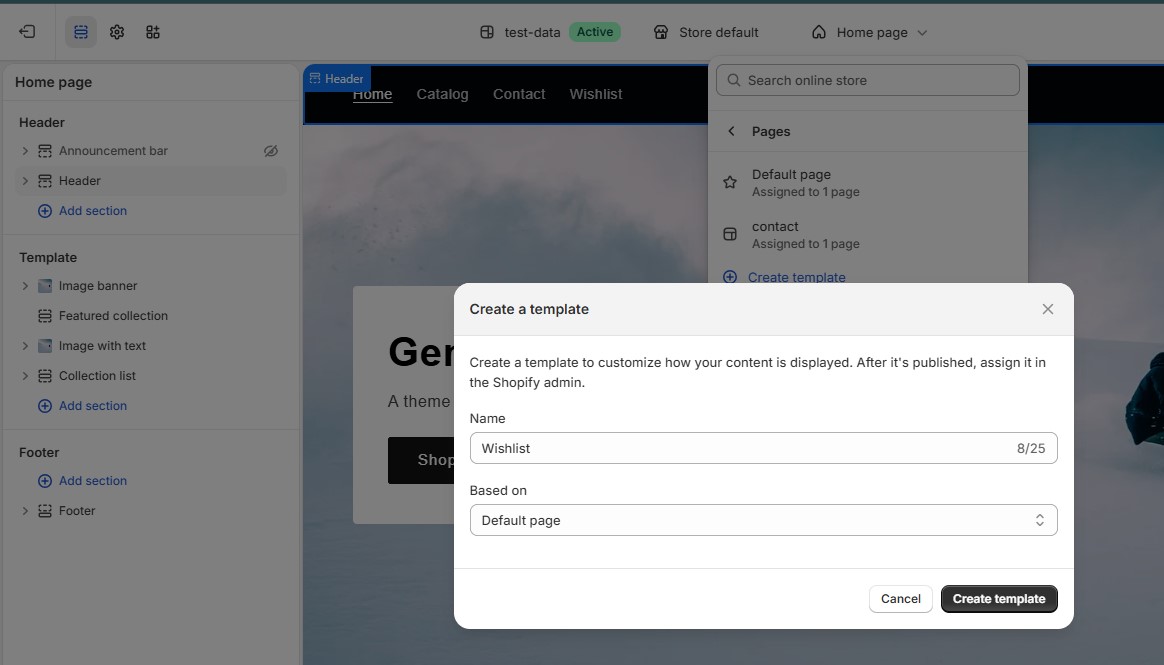
- Create template (for example
wishlist).
¶ 2. Add the Wishlist Page block
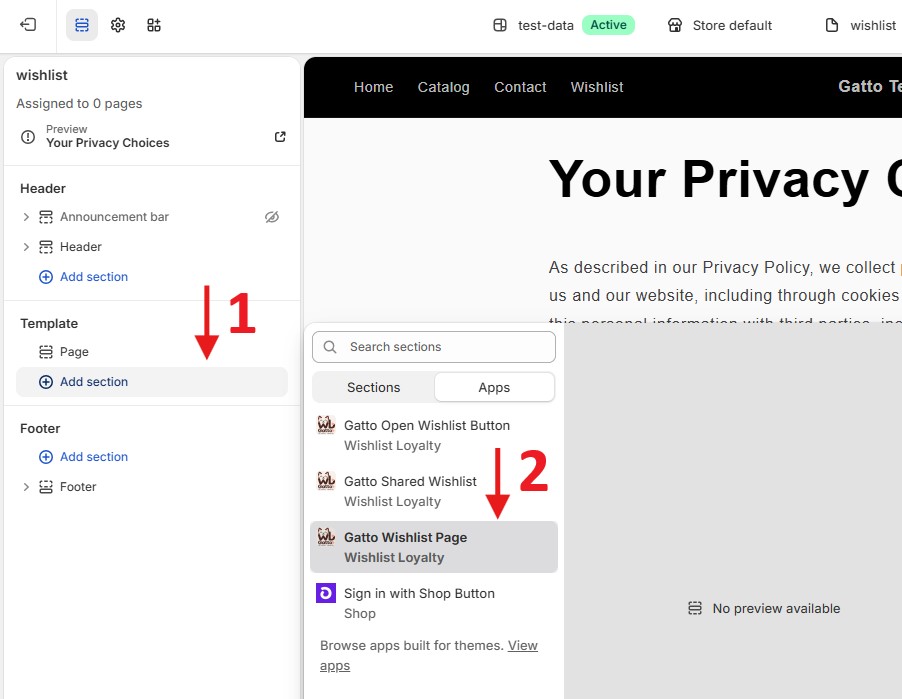
- On the new template, click Add section.
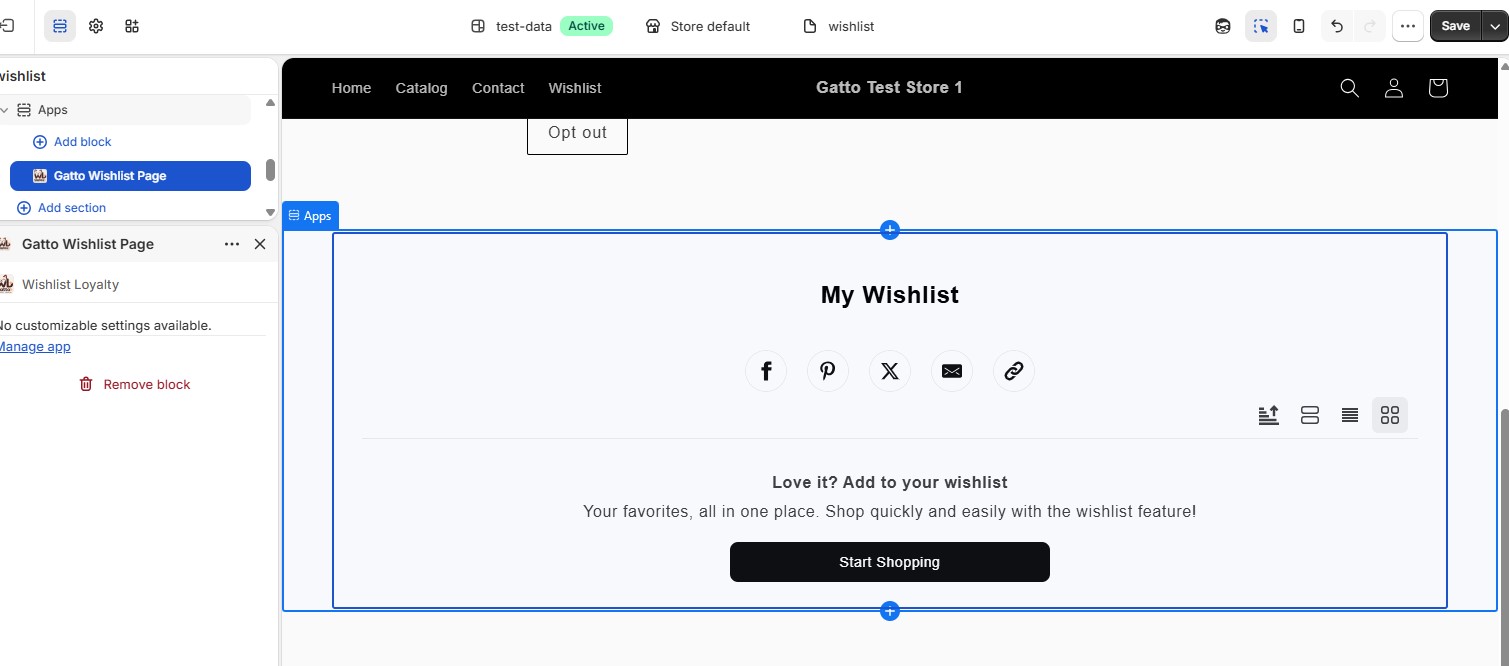
- Add Gatto Wishlist Page (
gatto_wl_wishlist_page). - Save the theme.
¶ 3. Create a Shopify page
- Online Store → Pages → Add page.
- Title it (for example Wishlist).
- Assign the template you created.
- Save the page.
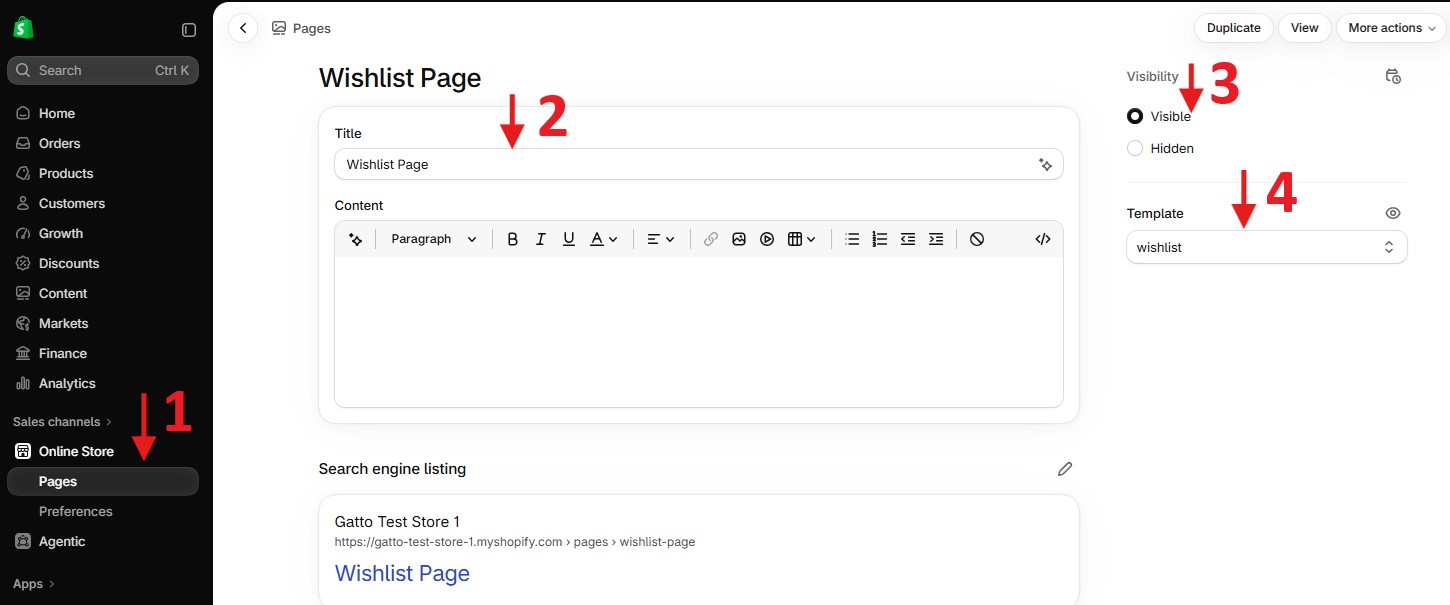
¶ 4. Point the app at that page
- In the app, open Wishlist Settings → Page & drawer → Page URLs.
- Under Wishlist details page, choose the page you created. Use Refresh if it does not appear yet.
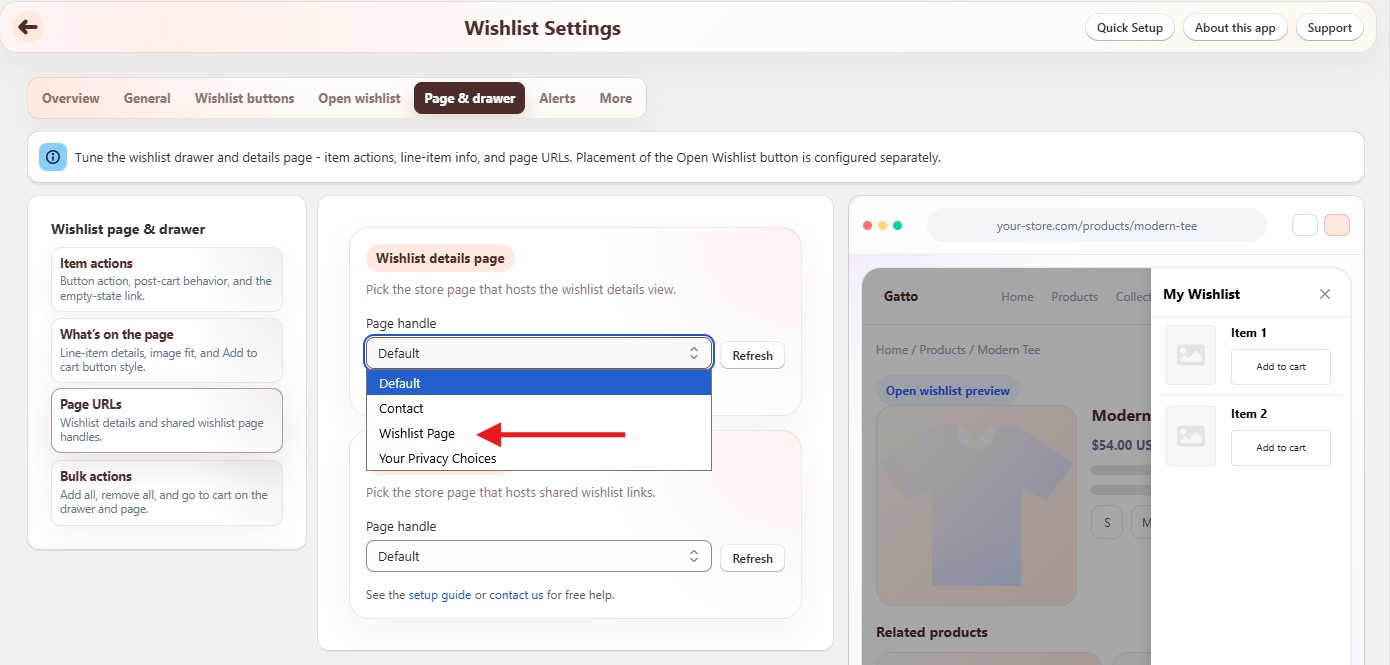
- Open Wishlist Settings → Open wishlist → Button behavior.
- Set When the button is clicked to Go to the wishlist page (not the drawer), if shoppers should land on this page.
Shared / public wishlist pages use the same kind of Shopify page + Gatto Shared Wishlist block. Pick that page under Page URLs → Shared wishlist page if you use sharing.