¶ User Guide: Show the wishlist button on the product page
Add an Add to wishlist button on product pages without changing theme files when you can.
Preferred order (no theme-file changes):
- Auto place near Add to cart - works on most themes with the app embed on.
- Theme Editor app block - Online Store 2.0 themes (drag and drop in Customize).
- Floating button - if Auto place cannot find Add to cart.
Use advanced theme-file placement only as a last resort when Auto place, the app block, and the floating button do not work.
Open: Wishlist Settings → Wishlist buttons → Product page placement.
Published guide: Wishlist button on the product page
¶ Before you start
- Turn on the app embed for the theme you are editing. This is the primary install path for storefront features.
- Open Wishlist Settings → Wishlist buttons → Product page placement.
- Choose an Install method, then click Save.
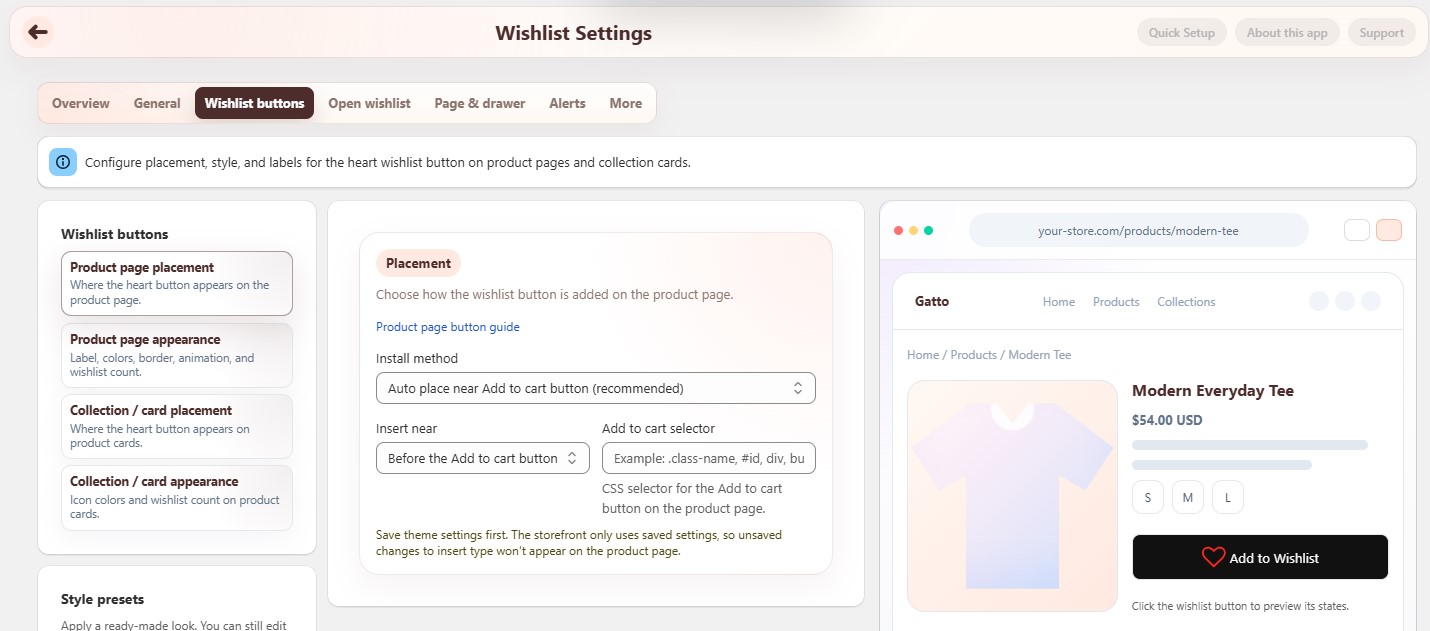
Appearance (label, colors, border, motion) is under Wishlist buttons → Product page appearance.
¶ Method 1 - Auto place near Add to cart (recommended)
The app places the heart near your product page Add to cart button. No theme-file changes required. Uses the app embed only.
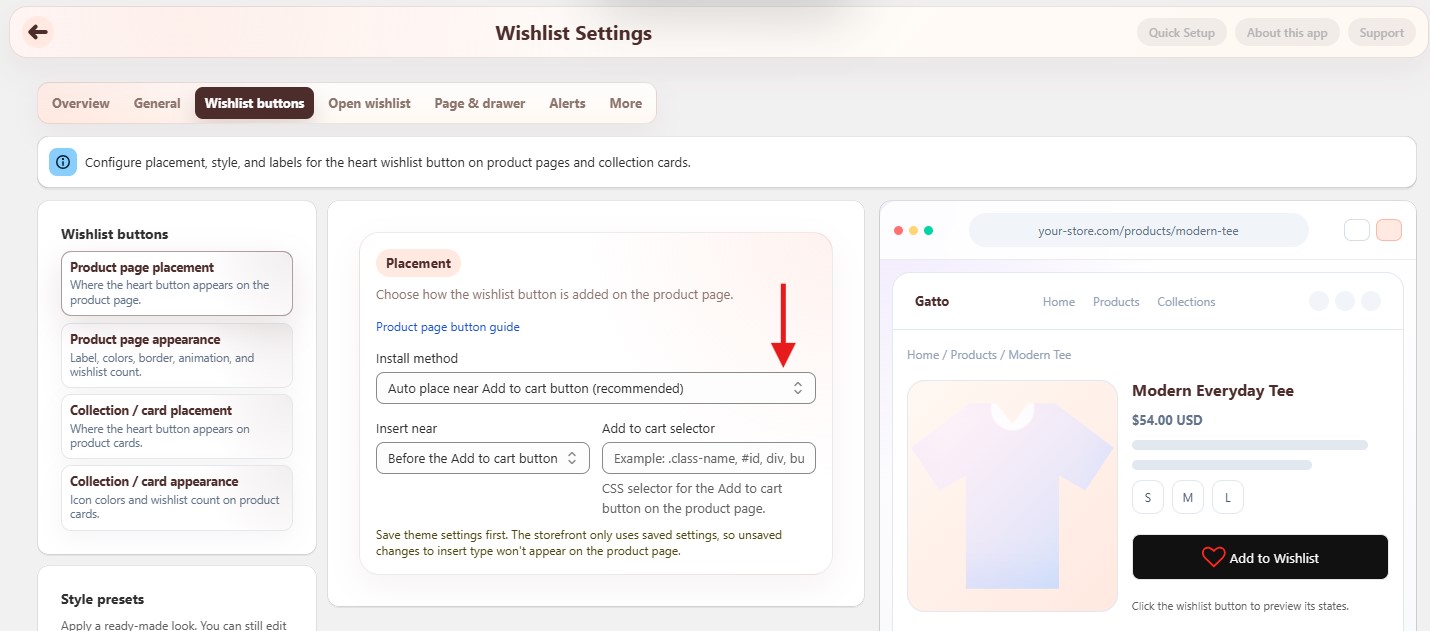
- Set Install method to Auto place near Add to cart button (recommended).
- Under Insert near, choose Before the Add to cart button or After the Add to cart button.
- Optional: set Add to cart selector if your theme uses a non-standard Add to cart button (CSS selector).
- Click Save.
- Open a product page and confirm the heart appears.
If the button does not show after save:
- Confirm the app embed is on for that theme.
- Use Verify on storefront (when available) on the placement settings.
- Try Method 2 - Theme Editor block or Method 3 - Floating button below before any advanced theme-file placement.
¶ Method 2 - Theme Editor block (recommended for Online Store 2.0)
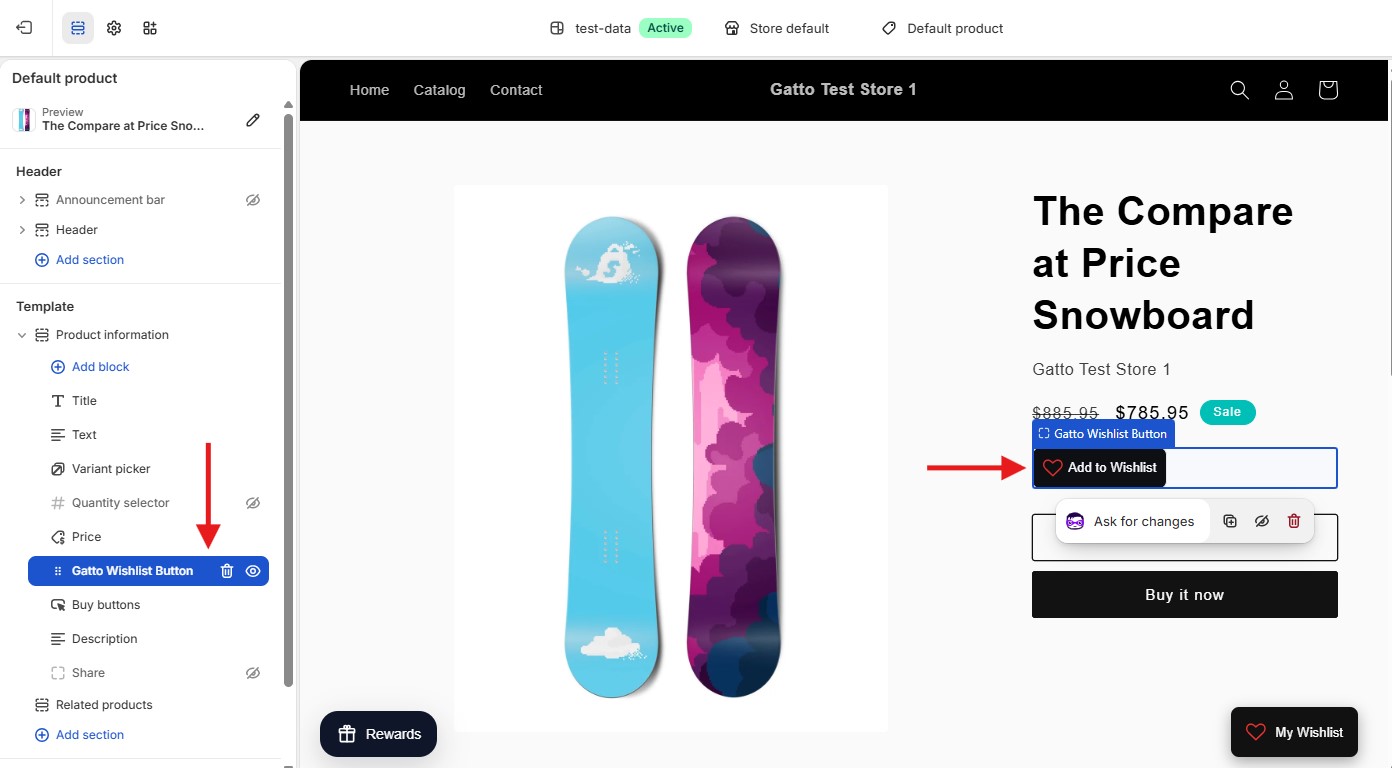
Use the theme app extension block in the theme editor. No theme-file changes. Best when you want exact placement next to price or Add to cart.
- Set Install method to Use Theme Editor block (drag & drop).
- Click Open theme editor to add the button (or open Online Store → Themes → Customize on a product template).
- Add the Gatto Wishlist Button app block (
gatto_wl_product_button).
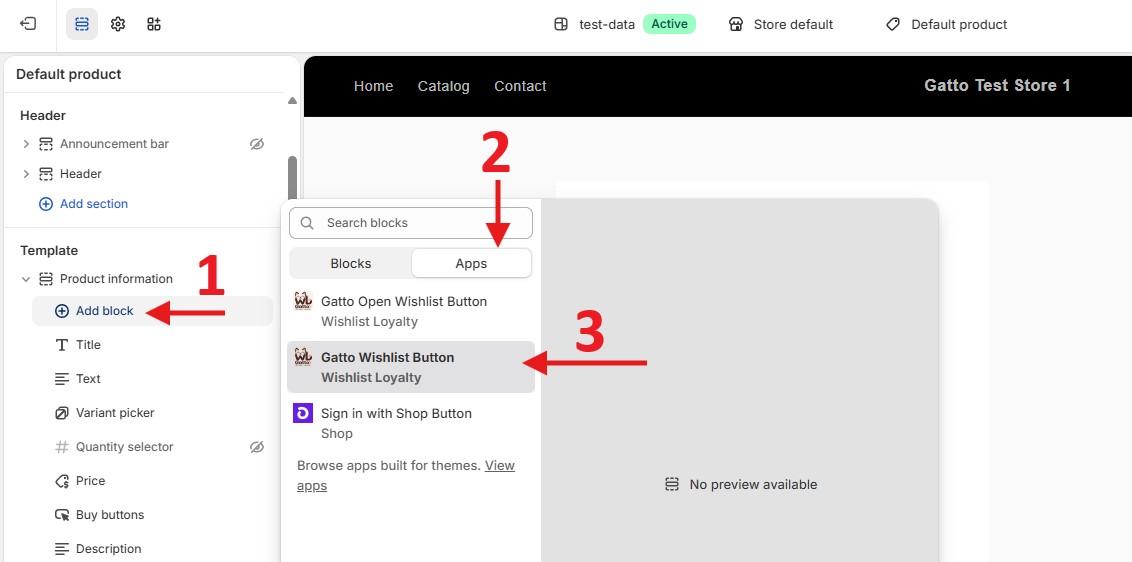
- Drag it next to the price or Add to cart, then Save.
¶ Method 3 - Auto display as a floating button
Shows a floating wishlist button on a corner of the product page. Useful when Auto place cannot find Add to cart. No theme-file changes required.
- Set Install method to Auto display as a floating button (recommended).
- Choose a Floating button corner (for example Bottom right or Top right).
- Click Save.
- Check a product page on desktop and mobile.
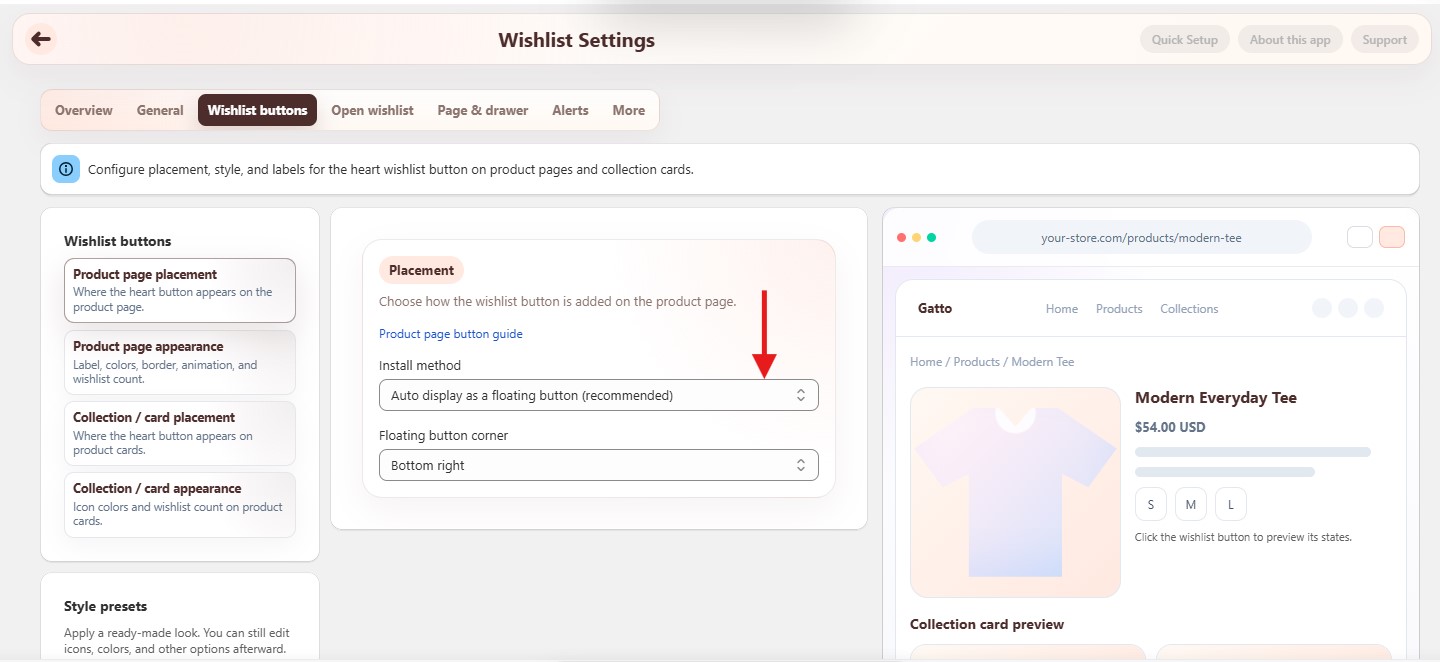
Full-width button stretch is not available for the floating option.
¶ Method 4 - Advanced placement in theme files (legacy / last resort)
Only use this if Methods 1–3 do not work on your theme. Online Store 2.0 themes should prefer the app embed, Auto place, or the Theme Editor block above. Opening theme files is optional and advanced (in Shopify Admin this is under Themes → … → Edit code).
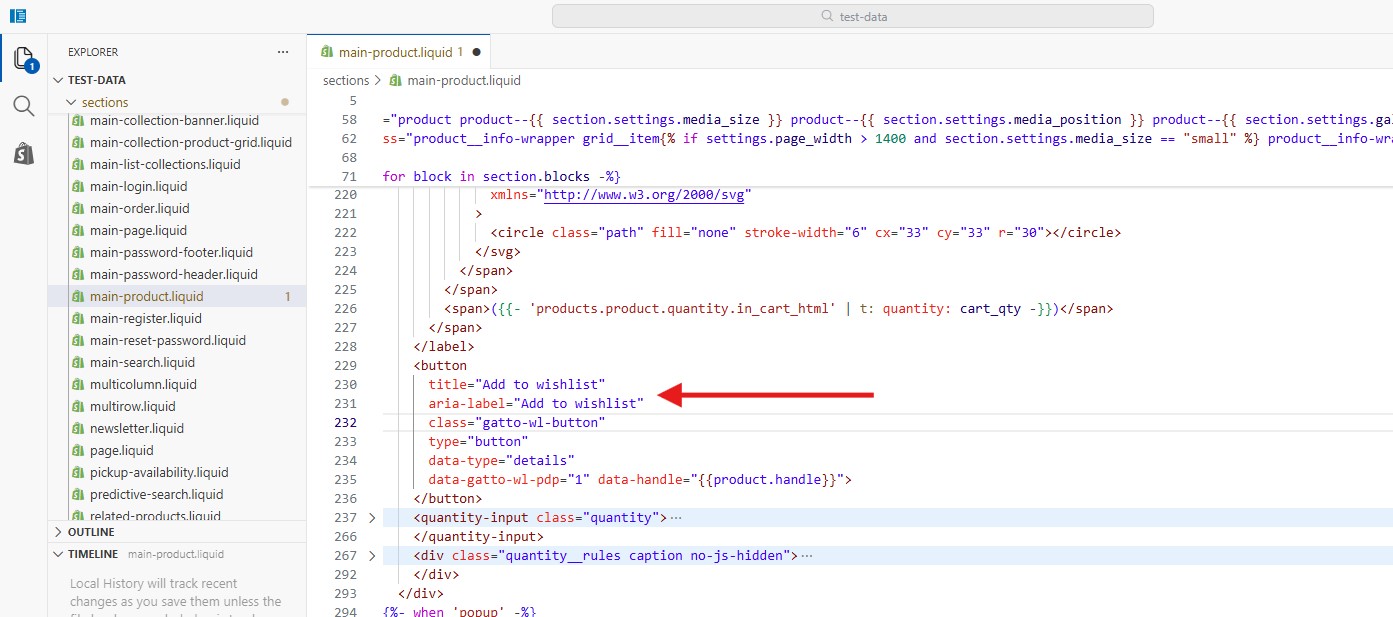
- Set Install method to Manually insert using code (advanced) (label in the app).
- Copy the button markup from the app (or use the HTML below).
- Duplicate the theme first so you have a backup.
- Open Online Store → Themes → … and open the theme files editor.
- Open the product template or section that renders the product form (often a product section under
sections/). - Add the button markup where it should appear, then save the theme.
- Check a product page.
<button title="Add to wishlist" aria-label="Add to wishlist" class="gatto-wl-button" type="button" data-type="details" data-gatto-wl-pdp="1" data-handle="{{ product.handle }}"></button>
¶ Tips
- Only one install method is active at a time. Prefer methods that do not change theme files.
- After changing method or appearance, wait a few seconds and hard-refresh the product page.
- Button text and colors: Wishlist buttons → Product page appearance, or Translations → Wishlist → Product page button.